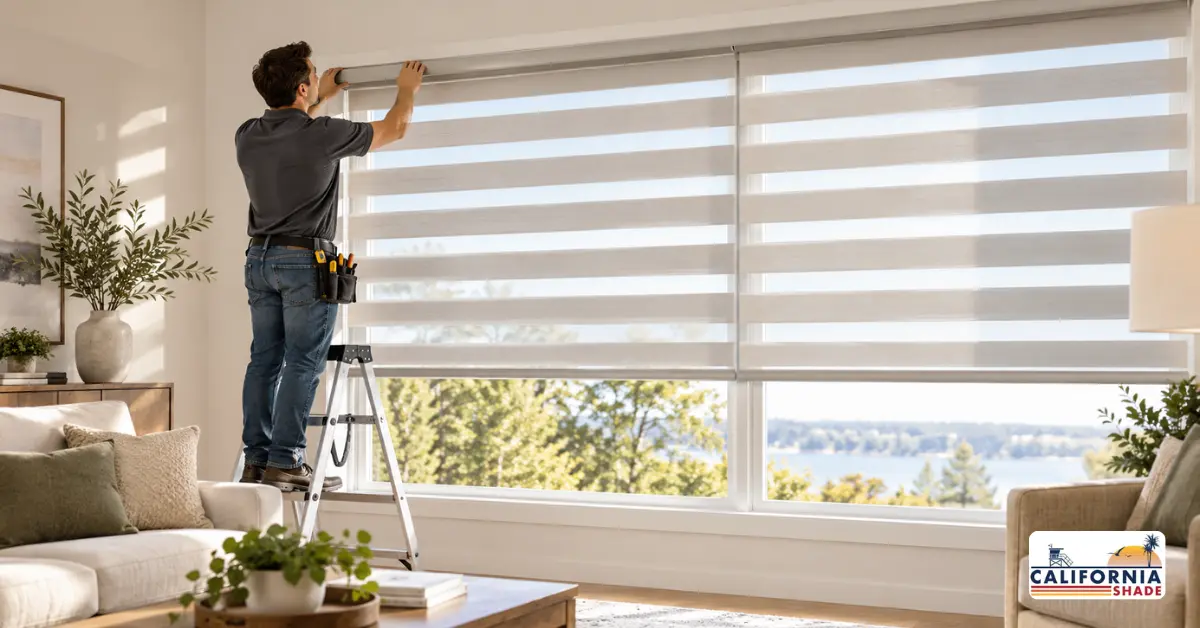
The full process of how to install sheer horizontal shades comes down to five moves: mark bracket spots, drill pilot holes, mount level brackets, snap in the headrail, and secure the cord tensioner. A clean finish depends on three things: brackets level across the full span, seated bump stops inside the headrail, and the right anchor for your wall surface.
Most Orange County homes have at least one window where DIY runs into trouble, which is why California Shade includes professional installation with every order. Call (714) 502-5501 to book a free in-home consultation.
TL;DR
- First-time install runs 20 to 35 minutes per window, faster after the third one
- Inside mount needs 2 inches of window depth; outside mount works on shallow frames
- Level brackets across the full span decide whether the shade hangs straight
- Stucco, arched tops, and two-story openings push most Orange County jobs past DIY skill level
- California Shade includes professional installation with every order, starting with a free in-home visit
What You Need Before You Start
A clean install starts with the right kit. Pull out a cordless drill with a 3/32-inch bit, a 12-inch level (or laser line), pencil, painter’s tape, tape measure, Phillips screwdriver, and a stud finder for outside mounts on drywall. Stucco walls across Orange County need a masonry bit and plastic sleeve anchors.
Each shade ships with a headrail, mounting brackets, screws, a Universal Cord Tensioner (UCT) kit, and optional hold-down brackets. Lay every part on a clean surface and dry-fit one bracket into the headrail cassette before drilling. That quick test shows how the bracket snaps and prevents re-drilling later.
This list assumes a single-story, square, wood-framed window. California Shade installers see every kind of OC opening: stucco, two-story foyers, arched tops, and sliding-door tracks each stack more tools and more risk onto the job.
Inside Mount vs. Outside Mount: Which Fits Your Window
The mount choice sets the look. Inside the mount sits the shade flush in the frame and shows your trim. The outside mount hangs on the wall or casing above the opening and hides the trim under the headrail.
| Factor | Inside Mount | Outside Mount |
| Window depth required | 2 inches minimum | None |
| Light gap | Small gap at edges | Full coverage |
| Best for | Deep, square frames | Shallow or out-of-square windows |
| Stucco-friendly | No | Yes |
Many windows across Orange County aren’t square. Settling, stucco lips, and original tract construction often leave a frame that measures three different widths top to bottom. California Shade installers check each opening in three spots before mounting; most homeowners measure once and find out the hard way.
Step-by-Step: How to Install Sheer Horizontal Shades
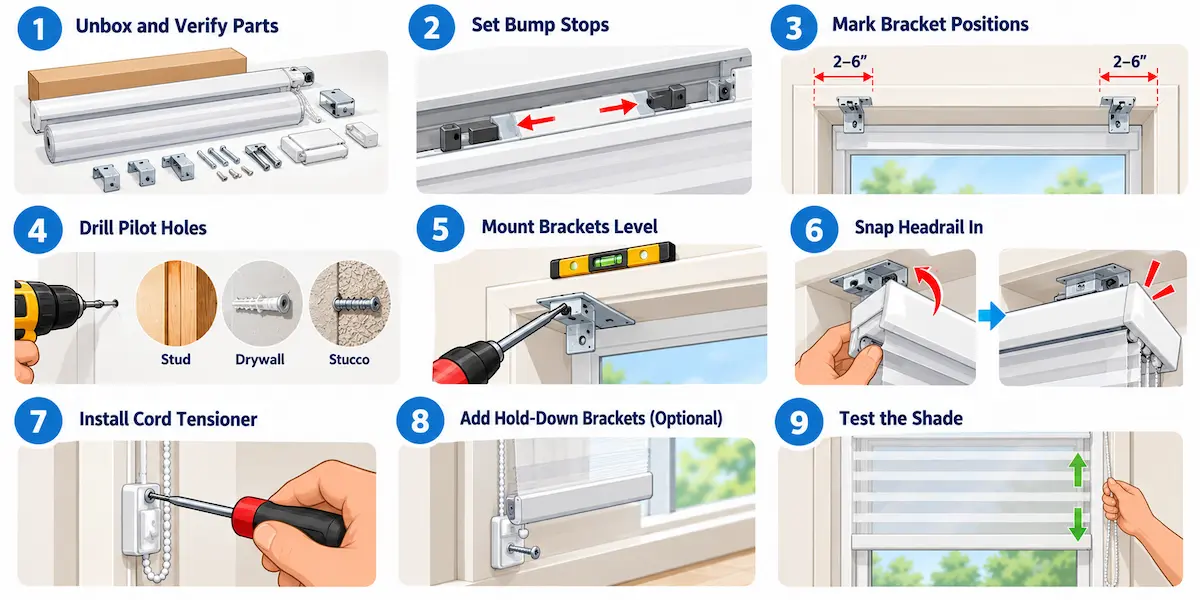
- Unbox and verify parts. Lay everything out, match the parts list, and confirm headrail width against the window measurement.
- Check the bump stops. Slide them to each end of the headrail so the bottom rail stacks evenly later.
- Mark bracket positions. Measure 2 to 6 inches in from each side. Shades wider than 36 inches need a center bracket; over 72 inches, add a fourth.
- Drill pilot holes. Use the 3/32-inch bit. For drywall, hit a stud or set a toggle anchor. For stucco, swap to a masonry bit and use sleeve anchors. This step cracks more stucco than any other in an OC home.
- Mount the brackets level. Screw each one in, then check alignment across the full span before tightening. Most crooked installs start here. A short level on a wide shade lies because the window itself often runs untrue.
- Snap the headrail in. Tilt it up into the front of the bracket, then push the back until it clicks on every clip.
- Install the cord tensioner (UCT). Anchor it tight to the wall or frame so the cord stays taut. Loose cords are a documented child-safety hazard.
- Add hold-down brackets (optional). Useful on doors and tilt-in windows. Drop the shade fully, mark the pin spot, then mount the bracket.
- Test the shade. Raise and lower twice. If the bottom rail stacks crooked, a bump stop slipped out of place.
California Shade jobs follow this exact sequence on every window across Orange County, with the bracket count matched to each shade’s span.
How to Get a Clean, Even Finish Every Time
A clean finish comes down to three habits, and pros nail all three on the first pass.
- Run a string line or laser across all brackets before final tightening. A 12-inch level looks accurate on a wide shade even when brackets sit off. A string from end to end tells the truth.
- Seat the bump stops at the headrail ends. Most uneven stacks trace back to stops that slid toward the middle in shipping. Push them to the endcaps before hanging the shade.
- Use the snap-off shim on the back of the bracket when the wall bows or the window sits out of square. The shim pushes the headrail forward by a few millimeters and pulls the front edge straight.
California Shade installers carry laser levels, masonry bits for Orange County stucco, and the exact spacers each shade ships with. The finish difference shows in week one, when light leaks through the side gaps of a DIY job but stays out of a pro install.
Mounting on Different Surfaces in Orange County Homes
The anchor changes with the wall; the procedure stays the same.
| Surface | Drill Bit | Anchor | Notes |
| Wood frame | 3/32-inch wood | Wood screw direct | Strongest hold |
| Drywall | 3/32-inch | Toggle or self-drilling anchor | Hit a stud when possible |
| Stucco | Masonry | Plastic sleeve anchor | Common on Orange County exteriors |
| Tile surround | Diamond-tip | Plastic anchor | Tape the spot first so the bit doesn’t walk |
Stucco drives more callbacks than any other surface across OC. Cracked stucco around a window means a patch bill, a paint match, and a visible flaw from the curb.
Tile surrounds in remodeled Newport Beach and Laguna kitchens or baths add a second risk: a slipped bit can chip the tile face, and chips don’t buff out. California Shade carries the right bit for each surface.
Troubleshooting Common Sheer Horizontal Shade Installation Problems
| Problem | Likely Cause | Fix |
| Shade hangs crooked | One bracket sits higher than the others | Loosen the low side, shim, re-level |
| Bottom rail stacks uneven | Bump stops slipped from the endcaps | Slide them back to the rail ends |
| Headrail won’t snap in | Bracket backwards or too far out | Verify orientation and projection |
| Cord won’t lock | UCT not anchored tight | Re-mount the tensioner snug |
| Light gap on sides | Inside mount narrower than the window | Switch to outside mount |
| Bracket pulls from drywall | Mounted with no anchor | Re-drill into a stud or set a toggle |
Every fix in the table means another trip up the ladder. California Shade jobs in Orange County carry a workmanship guarantee, so the second trip costs the homeowner nothing.
Why Most Orange County Homeowners Choose Professional Sheer Horizontal Shade Installation
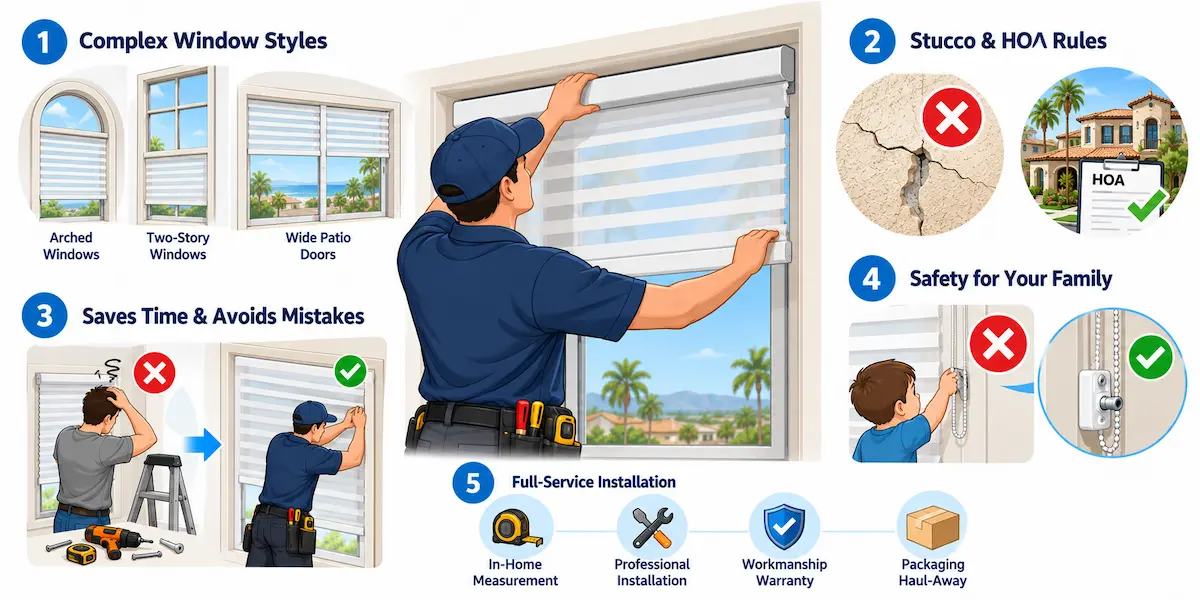
DIY install works on a simple window. Most homes across Orange County have at least one window that isn’t simple.
OC window styles fight DIY. Arched and Palladian tops in Mediterranean-style houses, two-story foyer windows in newer Irvine builds, wide sliding patio doors across the coast, and old plantation-shutter conversions all need custom bracket placement. Stock manuals assume a rectangle.
Stucco and HOA rules raise the stakes. Cracked stucco from a botched install runs $200 to $500 to patch and repaint. HOA-regulated tracts in Coto de Caza, Ladera Ranch, and parts of Mission Viejo also rule on exterior-visible window coverings, and a pro installer already knows those standards.
Time math goes against DIY. A whole-home job hits 8 to 15 windows. At 20 to 35 minutes per opening for a first-timer plus mistakes, that’s 6 to 10 hours over a weekend. A California Shade crew finishes the same scope in 2 to 3 hours with a clean-finish guarantee.
The U.S. Consumer Product Safety Commission has logged hundreds of child injuries tied to window covering cords, which is why every California Shade install verifies the cord tensioner against CPSC window covering safety guidance.
California Shade includes in-home measurement, professional installation by an in-house Orange County crew (no third-party contractors), a workmanship warranty, and packaging haul-away. Browse our sheer horizontal shades collection, check the cost guide, or browse all shades to compare options before the visit.
Call (714) 502-5501 to book your free in-home consultation.
Frequently Asked Questions
What’s the Minimum Window Depth for Inside-Mount Sheer Horizontal Shades?
Two inches. Anything shallower won’t clear the headrail cassette, and the shade will sit proud of the frame. Switch to an outside mount on shallow openings.
What Size Drill Bit Do I Need?
A 3/32-inch bit for wood and drywall pilot holes. Stucco needs a masonry bit; tile surrounds need a diamond-tip.
Can I Install Sheer Horizontal Shades by Myself?
A single small window, yes. A whole Orange County home with stucco, arched tops, or two-story openings, no. Pro install pays for itself in time and finish quality.
Do I Need to Drill Into a Stud?
On outside-mount drywall installs, hit a stud when you can. If you can’t, set a toggle bolt or self-drilling anchor rated for the shade’s weight.
Does California Shade Install the Shades It Sells?
Yes. The in-house crew handles every job across Orange County, from Newport Beach to Anaheim Hills.
What Does a Free In-Home Consultation Include?
Window measurement on every opening, fabric samples shown in your real room light, mount-type recommendation, and a written quote. Call (714) 502-5501 to schedule.
Final Thoughts on How to Install Sheer Horizontal Shades
A clean, even finish on every window of an Orange County home comes down to three levers: level brackets, seated bump stops, and the right anchor for the surface.
For most homeowners, the easier path is to let the California Shade in-house crew handle the work. Call (714) 502-5501 to book your free in-home consultation.