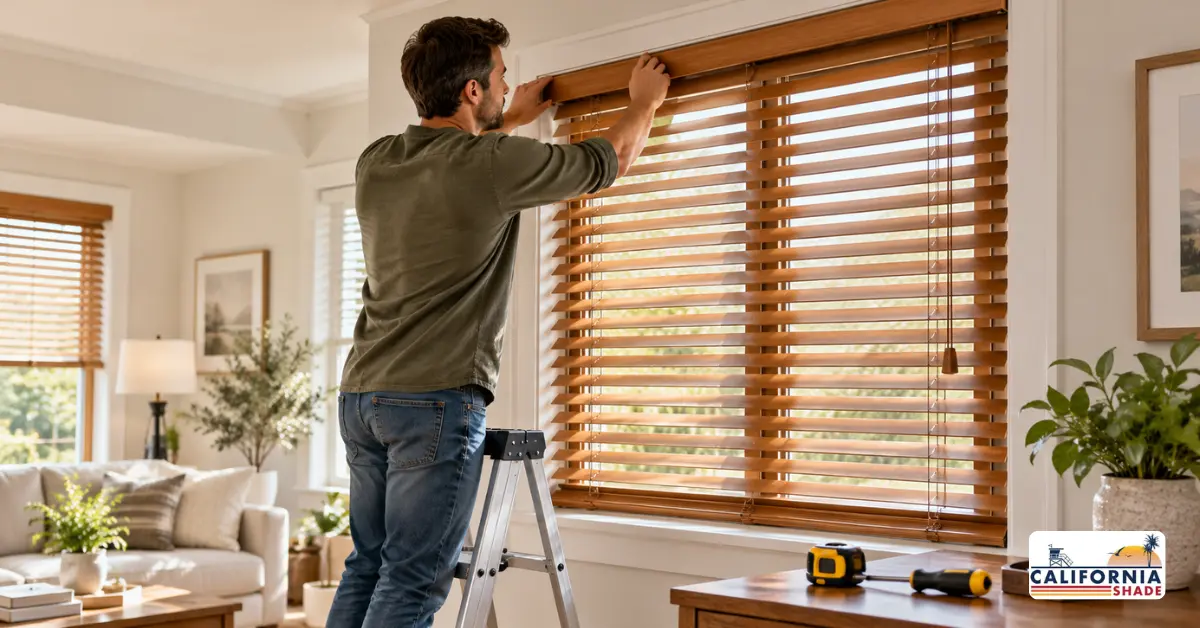
Learning how to install wood blinds takes an afternoon, a drill, and a spirit level. You mount the brackets, snap the headrail into place, clip on the valance, then attach the tilt wand. Most Orange County homeowners finish a standard bedroom window in under half an hour. The snapping isn’t what trips people up. Marking, drilling, and choosing a screw that actually holds in your wall does.
California Shade hangs wood blinds in Orange County homes daily, and this guide follows the same sequence our crews use.
TL;DR
- Mount the brackets, snap in the headrail, clip on the valance, attach the wand, then test.
- A standard bedroom window takes about 25 minutes.
- Level beats everything. A 1/8 inch tilt shows on any blind wider than four feet.
- Real wood blinds need a center support every 30 inches of width.
- California Shade installs wood blinds across Orange County and books free in-home consultations at 714-502-5501.
What Tools Do You Need to Install Wood Blinds?
Six tools cover the entire job. Every wood blind installation that California Shade runs across Orange County starts with this kit.
| Tool | Why you need it |
| Spirit level | An eighth-inch tilt is visible on a wide blind |
| Tape measure | Confirms bracket spacing and overlap |
| Cordless drill | Pilot holes and screws in one pass |
| Pencil | Marks that wipe off painted trim |
| Stud finder | Finds solid backing on outside mounts |
| Step ladder | Keeps both hands free at the rail |
The level matters more than the drill. Brackets set even a hair off pitch the rail, and a pitched rail lifts unevenly for years. Check twice before a single screw goes in.
Your box ships with brackets, screws, valance clips, and the wand. It won’t include drywall anchors or longer screws. Count every piece against the packing list first, because one missing center support bracket stops the whole job.
Do You Have Box Brackets or Hidden Brackets?
Wood blinds use one of two bracket styles, and yours determines where the screws go.
A box bracket wraps the rail end like a lid and stays visible from one side. A hidden bracket fastens behind or above the rail, then disappears once the blind hangs.
Identify yours in ten seconds. Measure the height and depth of your headrail, then hold a bracket against it. Box brackets match those two dimensions. Hidden brackets match the shape of the rail’s back channel instead.
Guess wrong and the rail won’t seat, but you’ve already drilled by then. Installers at California Shade confirm bracket style on every Orange County wood blinds job before a bit touches the wall.
Inside Mount or Outside Mount: Which Do You Have?
Whoever measured your window already picked the style. Check your order before drilling anything.
An inside mount sits inside the window recess for a built-in look. That needs a frame deep enough and square enough to hold the rail cleanly.
An outside mount screws to the wall above the window. Pick it when the frame is shallow, the opening is crooked, or you want the most light blocked.
Plenty of Orange County homes have shallow stucco returns with almost no frame depth, so those windows go outside mount. The California Shade team settles this during the free in-home visit before your wood blinds get ordered.
How to Install Wood Blinds on an Inside Mount
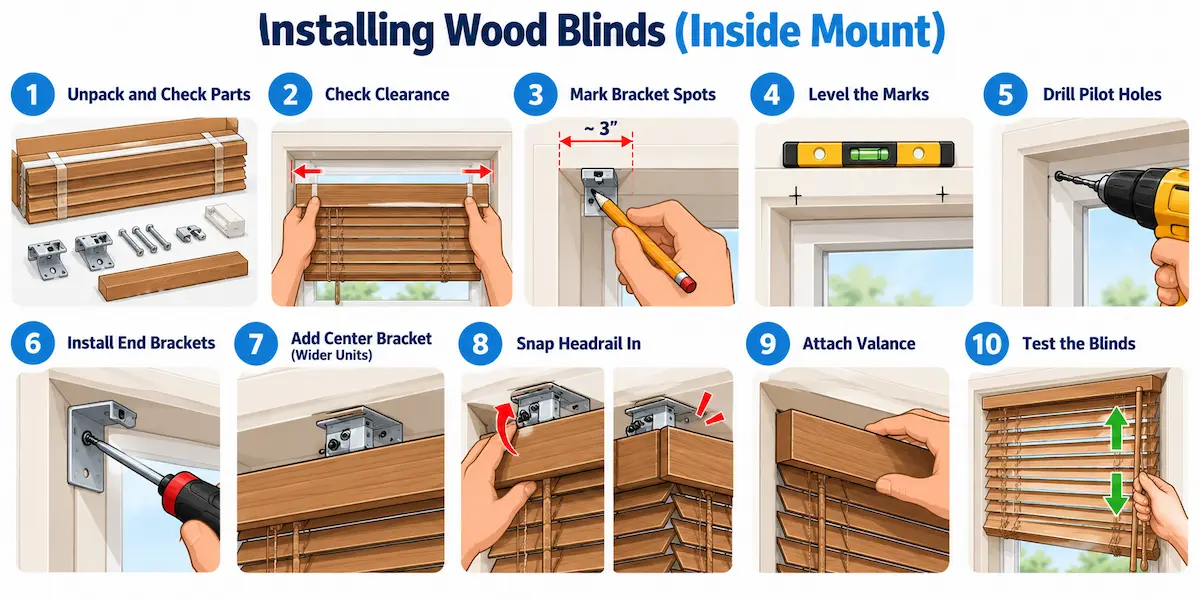
Ten steps, one action each. Work left to right and don’t rush step four.
- Unpack the blind and count hardware against the packing list.
- Hold the unit in the opening and check clearance at both ends.
- Mark bracket spots in both top corners, roughly 3 inches from each edge.
- Lay the spirit level across your marks and adjust until it reads true.
- Drill pilot holes, staying 1/4 inch back from the wood edge so the jamb won’t split.
- Drive the end brackets tight and flat against the jamb.
- Add center support brackets for wider units, keeping them clear of the ladder cord.
- Snap the headrail in and close each bracket gate until it clicks.
- Clip the valance onto the front of the rail.
- Raise, lower, and tilt the slats before you put the drill down.
If the rail fights you at step eight, the slats aren’t fully closed. Shut them and it drops right in. That single trick saves California Shade crews across Orange County several minutes per window.
Mounting Wood Blinds on an Outside Mount
Same sequence, four differences. Mounting wood blinds outside the frame changes where you mark and what you fasten into.
- Set your overlap. Cover the opening by 1.5 to 3 inches per side to close light gaps.
- Hold the unit level against the wall and mark just below the rail at each end.
- Add a second mark 1/8 inch past both rail ends. Bracket outside edges land there.
- Run the stud finder across your marks. No stud means a drywall anchor rated for the blind’s weight.
- Drill, then fasten both brackets.
- Snap in the rail and lock the gates.
- Attach the valance with its returns.
Inside mount blinds ship without returns. Outside mount units include them, and skipping those leaves raw ends showing. California Shade handles outside mount wood blinds on Orange County stucco walls where anchors matter more than technique.
How Many Brackets Do Real Wood Blinds Need?
Every blind gets two end brackets, plus one center support once width passes 36 inches, plus enough supports that no gap exceeds 30 inches.
| Blind width | End brackets | Center supports | Max gap |
| Under 36 in | 2 | 0 | n/a |
| 36 to 60 in | 2 | 1 | 30 in |
| 60 to 84 in | 2 | 2 | 30 in |
| Over 84 in | 2 | 3 or more | 30 in |
Manufacturer specs disagree here. Some call for support above 36 inches, others above 44. Space brackets 30 inches apart. That works for either rule.
Weight drives all of it. Real hardwood outweighs faux at identical width, so wide hardwood units bow first when supports run thin. Add one extra rather than leave it out. Compare weights across the full blinds range before ordering anything oversized for your Orange County home, or let California Shade spec it during the consultation.
What Screws Hold in Orange County Walls?
What’s behind the bracket decides your screw. Pick wrong and the blind pulls loose in a year.
| Surface | Fastener | Pilot hole |
| Solid wood jamb | 1 in wood screw | 1/8 in bit |
| Drywall over stud | 1.5 in wood screw | 1/8 in bit |
| Drywall, no stud | Toggle or self-drilling anchor | Per anchor spec |
| Plaster | Anchor plus 1.5 in screw | 3/16 in bit |
| Stucco or masonry | Sleeve anchor | Masonry bit |
| Metal frame | Self-tapping metal screw | 3/32 in bit |
Stucco shows up everywhere in Orange County, and an outside mount landing on it needs a masonry bit, not the screws in your box. California Shade carries the right anchors to every wood blinds install.
Don’t Skip the Cord Safety Step
Install the cord cleat or tensioner. It ships in the box and it takes ninety seconds.
The stakes are real. CPSC data shows about nine children under five die each year from strangling in corded window coverings, and among more than 200 reported incidents between January 2009 and December 2021, a child died in 48% of them. Read the CPSC safety release before you finish.
Cordless lift removes the hazard entirely. The wood blinds installation team at California Shade fits cordless units for Orange County families with small kids or pets.
Seven Wood Blind Installation Mistakes and Their Fixes
| Symptom | Cause | Fix |
| Blind hangs crooked | Brackets never leveled | Remove, re-level, patch old holes |
| Rail won’t snap in | Slats open, or brackets too far apart | Close the slats, measure bracket span |
| Slats hang lopsided | Ladder cord slipped off its drum | Take the unit down, reseat the drum |
| Blind rubs the frame | Not enough clearance | Add spacer blocks or extension brackets |
| Rail sags mid-span | Missing center support | Add one, tighten spacing to 30 inches |
| Wand binds | Slats already fully rotated | Stop turning before the gear strips |
| Screws won’t hold | Fastener wrong for the surface | Match the wall chart above |
Nearly all of these trace back to a bracket set without a level. California Shade handles wood blind repairs on Orange County service calls weekly, and a fix costs more time than checking took.
When Should You Call a Professional Installer?
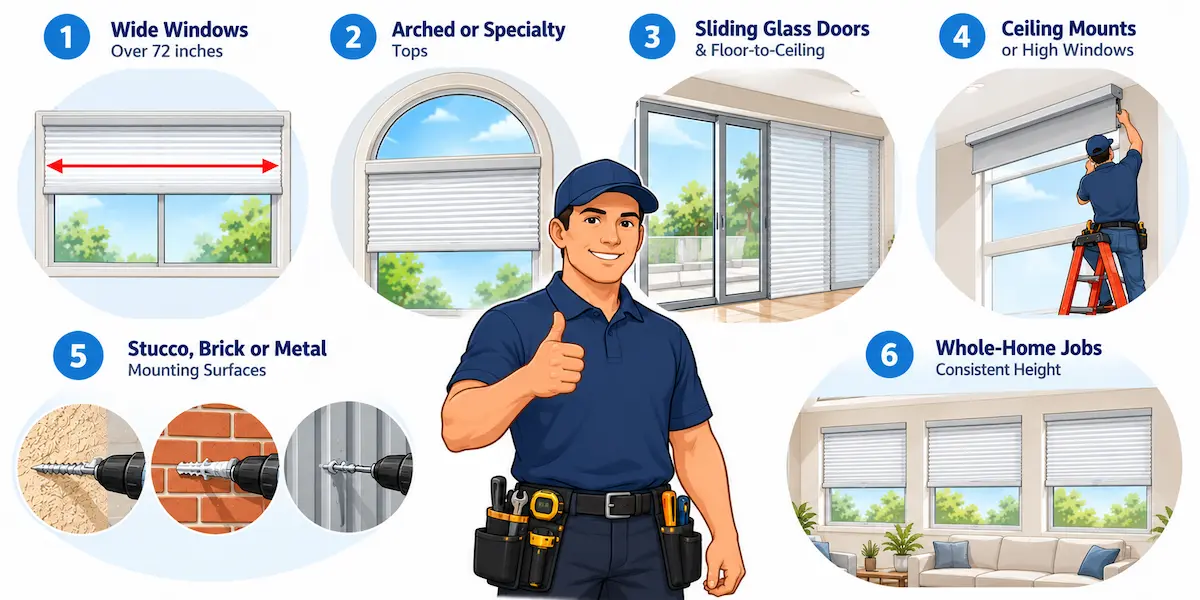
Most single windows are a fair DIY project. Six situations aren’t worth drilling twice for.
- Openings wider than 72 inches
- Arched, angled, or specialty tops
- Sliding glass doors and floor-to-ceiling glass
- Ceiling mounts or anything above the first floor
- Stucco, brick, or metal mounting surfaces
- Whole-home jobs where height must match room to room
Newer Orange County builds are full of tall windows and wide sliders, and those two turn a one-hour project into a two-day one fast. Weigh labor against materials in our wood blinds pricing guide, then call California Shade at 714-502-5501 for a free in-home consultation.
Wood Blind Installation FAQs
How Long Does It Take to Install Wood Blinds?
A standard bedroom window takes 20 to 30 minutes for a first-timer. Wide units with center supports run closer to 45. California Shade crews average 15 minutes per opening across Orange County because measuring happened beforehand.
Do I Need to Hit a Stud to Install Wood Blinds?
Inside mounts screw into the wood jamb, so studs don’t matter. Outside mounts do need solid backing. Without a stud, use a rated drywall anchor sized for the weight of your wood blinds.
Can One Person Install Wood Blinds Alone?
Solo works fine up to about 60 inches wide. Past that, hardwood rails get heavy and awkward overhead. Grab a second set of hands or book the California Shade wood blinds install team in Orange County.
Ready to Hang Them?
Now you know how to install wood blinds from bracket to wand. Level carefully, match the fastener to your wall, and add supports before the rail bows. When the window is oversized, arched, or set in stucco, California Shade covers Orange County with in-house installers. Call 714-502-5501 for a free in-home consultation.